Posts

Showing posts from October, 2022

Authentication: Register & Login with JWT in PHP & MYSQL

Image
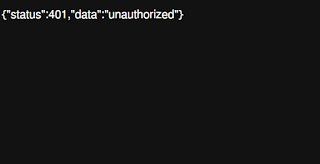
In the previous tutorial, you learnt to upload form data containing text fields and and image . This tutorial teaches you how to do authentication in PHP & MYSQL using JWT and restrict APIs to allow only authenticated users. From a client app, a visitor can register  a new user account using username, email, and password. The password is encrypted using PHP password_hash function before saving in database. The registered user logs in to the system using username and password. Behind the scene, after a successful login, a valid token will be generated on the server and sent to the client. Then whenever the client accesses the restricted APIs, it must send the token to be verified on the server. To generate and verify token in PHP, in the api folder, run the following command to install php-jwt: api>composer require firebase/php-jwt Execute the following command to create a migration file to create jwtusers. ./vendor/bin/phinx create JwtUsersTableMigration <?php declare (s

APIs to Upload form data with file in PHP & MYSQL

Image
In the earlier tutorial, you learnt to filter products by id and by name, limit the number of rows to return, and count products . In this tutorial, we will create more APIs to upload product form data with image file, and to delete products from MYSQL database. The uploaded files are stored in local storage (uploads folder). Open Controllers/ProductController.php file to add three more methods to handle product inserting, updating, and deleting. In PHP, form data submitted from a client app is available in $_POST variable and uploaded files will be in $_FILES variable.  In the addProduct() and updateProduct() methods, we simply get data from the POST variable and insert or update the data to MYSQL database using Prepared Statements.  To save the uploaded files to local storage, use move_uploaded_file() method. The deleteProduct() required one parameter - pid to delete a product by its id from the database. ......................... public function addProduct() { try {

Create APIs to access MYSQL database in PHP

Image
In the previous tutorial, you learnt how to do migration in PHP using Phinx and insert sample data to MYSQL database . In this tutorial, learn how to create APIs to list all products, list product by id, search products by name, count products, etc. Update config/config.php file to add database credentials: ................................. define ( 'DB_HOST' , 'localhost' ); define ( 'DB_USER' , 'user' ); define ( 'DB_PASS' , 'password' ); define ( 'DB_NAME' , 'database name' ); Then, create DB folder in app folder and add Database.php file to the DB folder. In the Database.php file, we define Database class that will be used to connect to Mysql database from controller classes. DB/Database.php <?php // Connect with the database. namespace App\DB ; class Database {   public function connect ()   {     $connect = mysqli_connect (DB_HOST,DB_USER,DB_PASS,DB_NAME);     if ( mysqli_connect_errno ( $connect )) {      

PHP Mysql Database Migration Using Phinx

 In this tutorial, you will learn to do Mysql database migration with Phinx . You will be able to create tables, add/alter table fields, and insert sample data to Mysql database. I recommend you to install XAMPP. It comes with Apache, Mysql and PhpMyAdmin to manage databases.  This tutorial assumes you already read the previous tutorial: PHP Routing & Restful APIs . In the api folder, run the command below to add Phinx to the project: composer require robmorgan/phinx Then, you need to create Phinx configuration file by the command: ./vendor/bin/phinx init The command created phinx.php configuration file in api folder. Modify the content of phinx.php file below to add credential information to connect to Mysql database on your local machine. <?php return [ 'paths' => [ 'migrations' => '%%PHINX_CONFIG_DIR%%/db/migrations' , 'seeds' => '%%PHINX_CONFIG_DIR%%/db/seeds' ], 'environments' =